Fireworks, BBQ, and sweets are my three of my favorite things that make July 4th my favorite holiday. This year some of my relatives will be at my parent’s house for the patriotic festivities. I have volunteered to be in charge of dessert. Juggling 40 hours and two online classes puts everything I do on a time constraint. I learned a big lesson this week; life taught me that not everything is going to turn how you planned for it to be. I had a baking disaster. A whole day and over 90 cookies wasted. I decided that I needed a quick, easy, foolproof recipe for the occasion and that strawberry filled with cheesecake would be the best. It is also great because it creates very few dishes!
For those of you who haven’t figured it out yet, baking is a science and everything needs to be exact. I learned the hard way. I tried to make eight dozen cookies this week to create a perfect American flag made up of sugar cookies. My plan was to lay them out in a 10×9 format and icing them accordingly with red, white and blue icing. I couldn’t find a recipe in my mom’s mess of a recipe bin so I just looked on up online and went to town on these cookies. I prepared the dough, let it sit for 2 hours and got everything prepared so I could roll them, use a cookie cutter and get them in the oven as quickly as possible. I scooped some dough out and the first thing I noticed was that it was way too sticky to be worked with. For me, this was a nightmare. I panicked and was ready to cry. My mother is not much of a baker and when she saw the look of terror on my face she told me just to give it up and go out and buy cookies. My aunt and uncle saw how much effort I had already put into these cookies and was by my side ready to help save my disaster. We added a ton of flour to make the dough not sticky, 20 minutes and 4 cups of flour later the dough was ready to be handled. We finally got eight dozen cookies cut and baked. By this time it is 9:00 pm and I am exhausted. While I was waiting for the cookies to cool I started to prepare the icing. I realized that since I was making homemade icing I didn’t know how to make it white. The vanilla was turning the powdered sugar brown. I was also annoyed because I only had the gel food coloring and it wasn’t making the icing as red or blue as dark as I wanted it to be. At this point I was ready to throw in the towel and call it quits. I decided to just suck it up and power through the last bit and use whatever icing I made to decorate the cookies. Little did I realize that when I was making the icing I used a little too much milk and it became too thin to spread on to the cookies. As I am sitting there slaving away I hear comments from my family like “Aren’t they supposed to look like starts?” “They look more like dog treats!” “They are too dry.” As much as I wanted these cookies to come out perfectly I finally realized that it was not going to happen. I put all the cookies into a bag and decided to bring them into work. There was bound to be a hungry guy willing to eat them. Sure enough, after working a tent sale for 8 hours they were gone in a blink of an eye. All in all, every great baker has their trial and errors. I am sure this isn’t going to be my last disaster. When all else failed, I reverted to a recipe I knew would save the day, strawberry filled with cheesecake
These aren’t your typical cheesecakes that you would purchase at the store. This is strawberry stuffed with cheesecake! The perfect finger food that’s also no bake! This recipe only has 5 ingredients and will definitely have everyone asking for more. I have made these several times for Sunday Funday and everyone always wants some to bring home to their family.
STAR SPANGLED SUGAR COOKIES
Here I wanted the cookies to look like.

I found the picture here.
STRAWBERRY FILLED WITH CHEESECAKE
Ingredients:
- 1 lb of Strawberries
- 1 eight ounce package of cream cheese
- 3 tablespoons of powdered sugar
- 1 teaspoon vanilla extract
- Graham cracker crumbs
Directions:
- Clean strawberries and remove the stop and center with a sharp knife.
- With a mixer, combine cream cheese, powdered sugar and vanilla extract until smooth.
- Put the cheesecake mixture into a piping bag and fill the strawberries. (If you’re not fully stocked with baking supplies, like me, you could put it into a plastic baggie and snip off a corner and pipe.)
- Dip the top into the graham cracker crumbs
- Serve and enjoy!
I placed mine into cupcake tins, but you could also slice off the bottom and serve them on a tray.
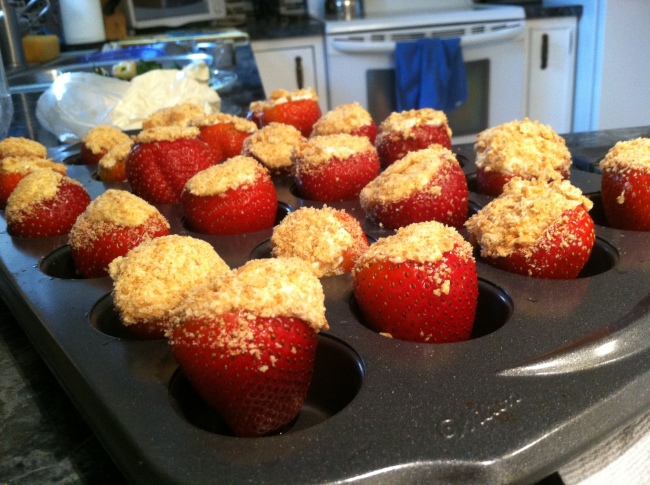
Photo by: Amanda Hilderbrandt


